|
Mach3 has a built in macro/scripting
engine based on a product called Cypress ENABLE.
The scripting engine let's you edit the standard M-codes
but also enables you to create custom M-codes that can
be called from your G-code. A typical example is
modifying the M6 macros to operate an automatic toolchanger.
Another use of the
scripting engine is the button scripts. Behind some of
the buttons on the Mach3 screen there's a macro which is
run when you click that button (the RefAll button being
one of them). Those macros can be changed to work
different from what they do out-of-the-box. The RefAll
button for example can be changed so that the axis
home's in a different order or even all at the same
time. It's also quite easy to add your own buttons and
embedd macros in them to do custom things.
The macros can be created
and edited with any standard texteditor, like Notepad
for example, but
Mach3 has a built in editor with nice features like
syntax colouring, single stepping and breakpoints which
can be a big help when writing, testing and debugging
complex macros. The editor may not look "much" compared
to modern IDE's (Integrated Development Enviroment)
but it does what can be expected of it.
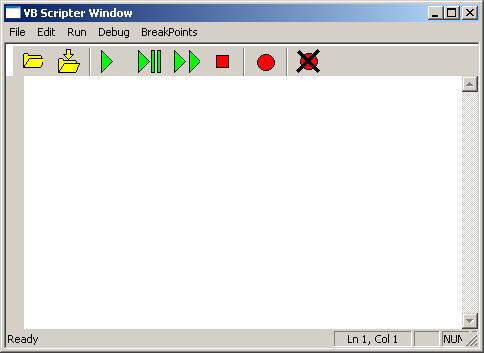
The editor is started by
selecting Operator/VB Script Editor and it
looks like this:
Besides all the commands
in the
CYPRESS ENABLE language Mach3 has a quite
a few commands that are callable from
the macros. These commands can be used to read values
from the various DRO's (GetDRO), check status of
Mach3's LED's (GetLED) and tell Mach3 to move the
machine to a certain position (Code "G0 X10")
among a lot of other things.
Let's say we want to create a button that "cycles" thru
the screens in Mach3. At our disposal we have a macrocall, GetPage(),
that returns an Integer stating which screen is displayed at the moment. All we
need to do is increment that number by one and then call
another command, DoOEMButton() that "pushes" the
correct screen select button for us. There are 50
screens available in Mach3 and by calling the command
DoOEMButton() with a number between 1 and 50 that
particular screen is displayed. The standard Mach3
screenset has only 6 screens so we write the code so
that only those first 6 screens will get displayed.
Dim Screen As Integer
'Declare a variable of type Integer
Screen = GetPage()
'Ask Mach3 which screen is being displayed now.
Screen = Screen + 1
'Increment that number...
If Screen > 6 then Screen = 1
'and make sure it stays between 1 and 6
DoOEMButton(Screen) 'Then display the next screen.
Suppose our spindle
motor has a springloaded break that needs to be
activated before we can turn the motor on. The relay for
the break is driven by Mach3's Output #3. When
the spindle is stopped the break should de-activate.
What we do is to modify the existing M3 and M5 macros
to look like this:
'---=== M3 Macro ===---
ActivateSignal(Output3) 'Release the break
Sleep (200)
'Wait
200mS
DoSpinCW()
'Start spindle
The
ActivateSignal(Output3) does just that - activates
Output #3 then we wait 200mS using the Sleep command to make sure that the
break has enough time to release. Finally we call
DoSpinCW() which actually starts the spindle. In
previous versions of Mach3 the Sleep command had to be
declared inside the VB-code but that is now handled by
Mach3 internally.
To turn the spindle OFF
and apply the break we modify the M5 macro to look
something like this:
'---=== M5 Macro ===---
DoSpinStop()
'Turn off the spindle
While GetOEMLED(813)
'Check the Dwell-LED and loop...
Sleep (50)
'here until it turns OFF
Wend
DeActivateSignal(Output3)
'Apply the break.
First we call DoSpinStop()
which is a Mach3 "command" to stop the spindle. In this
case the break is not supposed to actually break the
spindle but to hold it in place once it's stopped so it
wouldn't be a good idea to activate the break before the
spindle has come to a complete stop. To do that we can
look at Mach3's LED number 813. This is the Dwell
LED and it is ON while the spindle spins down. The
duration of the spin-down time is set in Mach3. Once the
Dwell LED goes off we call the command to turn off our
output. We use the sleep command here too but for
another reason. If we wouldn't have the sleep command
inside the While-Wend loop the scripting engine would
try it's best to check the LED as fast it possibly could
which would use up a lot of CPU power. By issuing a
sleep of 50mS the LED is only checked around 20 times
per second instead of tens of thousands.
Here's a macro that closes down Mach3 and
shuts down the PC. If saved as M300.m1s for example we
can call that instead of M30 at the end of the G-code
and it will shut down the PC for us.
Code "M30"
'Stop and rewind
If IsLoading = 0 Then
'Is
the code loading or should we actually run it?
Message("Shuting down...") 'Tell operator we are shutting down.
DoOEMButton(705)
'OEMButton705 shuts down the
PC
End If
When Mach3 loads a G-code program it runs
thru it to be able to create the toolpath display among
other things. This means that our macro code actually
gets executed which in this case would shut down the PC
as soon as the G-code program loads - not very good.
To prevent that from happening we can
call IsLoading(). It returns TRUE (or the
value 1) if the code executes due to it being loaded or
regenerated by Mach3. If the macro is run because the
G-code is actually being executed IsLoading()
returns FALSE (or the value 0). If the G-code is
executing we "push" OEMButton 705 which shuts down Mach3
and the PC.
Genrally it's not recomended to call one
macro from another like is being done here but it this
case it seems to work just fine.
Basically anything you can do in G-code can
be done from a macro by sending G-code statements to
Mach3 with the Code-command. Here's a (very simple)
example:
Dim i As Integer
'Declare a variable, i, of type
integer
Code "G91"
'Switch to INC mode.
For i = 1 To 5
'Loop 5 times
Code "G0 X5"
'Move the X-axis 5 units
Code "G0 Y5"
'Move the Y-axis 5 units
Next
Code "G90" 'Switch back to ABS mode.
We can also use the
scripting engine to create G-code for us. By
calling the command OpenTeachFile() all Code-statements
from now on will be written to that file instead of
being executed by Mach3. We can then ask Mach3 to load
the previously created file by calling LoadTeachFile().
The following example shows how that can be used. It
displays a series of dialog boxes asking the user to
enter information and "writes" the code based on the
data entered. The code can easily be extended with
features like error-handling (user enters non numeric
data, for example).
Dim Xpos, YPos, SpindleSpeed, Feed, Depth As Double
Dim Clearance, Peck, Dwell As Double
Dim i, Holes As Integer
OpenTeachFile "G83 Drill.tap"
'Open
the teachfile, name G83 Drill.tap
SpindleSpeed = InputBox("Please enter desired spindle speed:")
'Ask
user to input spindle speed
Feed = InputBox("Please enter desired feedrate:")
'Ask user to input feedrate
Code "M3 S" & SpindleSpeed & " F" & Feed
'Write
G-code to file.
Holes = InputBox("How many holes to drill?")
'Ask
user how many holes to drill
If Holes > 0 Then
Depth = InputBox("How deep are they?")
Peck = InputBox("How deep per peck?")
Clearance = InputBox("Please enter the Z axis clearance
height between holes")
Dwell = InputBox("Please enter dwell time in seconds")
Xpos = InputBox("X coordinate for hole no. " & 1 & "?")
Ypos = InputBox("Y coordinate for hole no. " & 1 & "?")
Code "G83 X" & XPos & " Y" & YPos & " Z-" & Depth & " R" &
Clearance & " P" & Dwell & " Q" & Peck
For i = 2 To Holes
Xpos = InputBox("X coordinate for hole no. " & i)
Ypos = InputBox("Y coordinate for hole no. " & i)
Code "X" & Xpos & " Y" & YPos
Next
Code "G80"
End If
LoadTeachFile()
CloseTeachFile()
This example creates a
file called myFile.txt in the Mach3 folder. It
then reads the current position of the X-axis and writes
it to the file. Lastly it closes the file.
Dim X as Double
Open "C:\Mach3\myFile.txt" For Output As #1
X = GetDRO(0)
Print #1, X
Close #1
And here's code that opens the file created
in the previous example and reads a single line from it.
It then asks the user if it's OK to move the X-axis to
the position stored in the file.
Dim Answer
Dim newPos As Double
Open "C:\Mach3\myFile.txt" For Input As #2 'Open the file for reading
Line Input #2, newPos
'Read the first line of the file
Answer = MsgBox ("Is it OK to move the X axis to: " &
newPos & "?", 1)
If Answer = 1 Then
'You pressed OK
Code "G0 X"& newPos 'Make the move
End If
Close #2
'Close the file
This snippet of code
simply takes the content of the tool table in Mach3 and
saves it to a .txt file. The will be saved in the Mach3
directory as myTools.txt but that can obviously be
changed whatever is needed.
Option Explicit
Dim Response As Integer
Dim Path As String
Dim ToolNumber As Integer
Dim ToolDiameter As Double
Dim ToolLength As Double
Dim ToolDescription As String
Dim i As Integer
Path = GetMainFolder & "myTools.txt"
Open Path For Output As #1
Print #1, "Mach3 Tooltable printout" & Date() & " " &
Time(Now)
Print #1,""
Print #1, "Tool:" & Chr(9) & "Diam:" & Chr(9) & "Length:"
& Chr(9) & "Description:"
For ToolNumber = 1 To 250
ToolDiameter = GetToolParam(ToolNumber, 1)
ToolLength = GetToolParam(ToolNumber, 2)
ToolDescription = GetToolDesc(ToolNumber)
Print #1, ToolNumber & Chr(9) & ToolDiameter & Chr(9) & ToolLength
& Chr(9) & ToolDescription
Next
Response = MsgBox("Your file is at the following
location: " & Path, 0)
Close #1
On the Mach3 Yahoo user
group a user asked if it was possible to change the
acceleration of an axis from a G-code program. The idea
behind the question to create a program which kept
increasing the acceleration while running the axis back
and forth in order to find a suitable value. I usually
just do it thru trial and error but I kind of liked the
idea so I came up with the following code.
(This has actually been
expanded a bit from what I originally posted).
Option Explicit
Dim CurrAcc As Double
Dim AccIncrease As Double
Dim Axis As Integer
If IsLoading() <> 1 Then
Axis = Param1() ' Get P-value in call
AccIncrease = Param2() ' Get Q-value in call.
Select Case Axis
Case 0 'X-axis
CurrAcc = GetParam("AccelerationX") ' Get current acceleation.
SetParam("AccelerationX", CurrAcc + AccIncrease) ' Set new
acceleration.
Case 1 'Y-axis
CurrAcc = GetParam("AccelerationY") ' Get current acceleation.
SetParam("AccelerationY", CurrAcc + AccIncrease) ' Set new
acceleration.
Case 2 'Z-axis
CurrAcc = GetParam("AccelerationZ") ' Get current acceleation.
SetParam("AccelerationZ", CurrAcc + AccIncrease) ' Set new
acceleration.
Case 3 'A-axis
CurrAcc = GetParam("AccelerationA") ' Get current acceleation.
SetParam("AccelerationA", CurrAcc + AccIncrease) ' Set new
acceleration.
Case 4 'B-axis
CurrAcc = GetParam("AccelerationB") ' Get current acceleation.
SetParam("AccelerationB", CurrAcc + AccIncrease) ' Set new
acceleration.
Case 5 'C-axis
CurrAcc = GetParam("AccelerationC") ' Get current acceleation.
SetParam("AccelerationC", CurrAcc + AccIncrease) ' Set new
acceleration.
End Select
End If
If the above is saved as,
for example, M1234.m1s it can be called from a G-code
program. So if we wanted to run the Y-axis back and
forth, increasing the acceleration by 25 units/s/s each
time the G-code program could look something like this:
G0
Y100
G0 Y0
M1234 P1 Q25
M47
|